Lesson Plan Two: 3D Concepts and Designs
Setup
- Prepared Slide Presentation
- Bring in 3D printed T-Rex head from Lesson One
- Print the T-Rex Head Photo
- Prepared Handout: Shape Matching Game. Link located in Supplementary Materials. See here for sample. Print out 12-14 copies, and use paper cutter to cut out along the lines, and place each grouping into a ziplock bag.
- Get a box of Model Magic packets. Link located in Supplementary Materials
- Prepared Handout: From 2D to 3D. Link located in Supplementary Materials. See here for sample. Print out 6-8 copies of each shape.
Materials
- Computer
- Prepared Slide Presentation
- Projector
- T-Rex Head
- Handout: Shape Matching Game
- 12-14 ziplock bags
- Handout: From 2D to 3D
- Model Magic packets
- Student notebooks
- Writing materials (pencils, pencil crayons, crayons, markers etc.)
Vocabulary List
- 3D
- 2D
- Computer Aided Design (CAD)
Sentence Stems
Write the following sentence stems on the board prior to the lesson, for student reflection at the end of class
A __________________ is 2D, because __________________________________.
Answers: 1) Drawing, print out, words on paper 2) it is flat, you can only measure it’s length and width, it does not project out into space
A ______________________ is 3D, because ______________________________.
Answers: 1) object, 3D object, everyday object examples (e.g. chair, person, pencil etc) 2) You can measure its length, width, and length, it projects out into space, it is solid
Introduction/Attention Getter
Timing: 10 Minutes
Materials
- Computer
- Projector
- Slides 1-3
- 3D printed T-Rex Head
- Student notebooks
- Writing materials (pencils, pencil crayons, crayons, markers etc.)
Process
- Project slide 1 and state "Today we will be continuing our lessons on 3D printing. Today we will learn about the difference between 2D versus 3D, and how to make a 3D object from a 2D drawing. When we have something that is 2 Dimensional, it is flat, like a drawing, or something you print from a regular paper printer. When we have something that is 3 Dimensional, it is an object, like a chair, or something you can print from a 3D Printer."
- Project slide 2 and state: "When we draw something, it is 2 Dimensional -we measure it by width and length -it's 2 Dimensions."
- Project slide 3, and hold up the T-Rex skull. State "When we have a 3D objects, there are 3 Dimensions projecting into space: width, length AND depth (or thickness). When we want to create a 3D object to print out on a 3D printer, we use a program called Computer Aided Design (CAD). Often, we will create a 2D drawing of our model, and then create the 3D object from the flat, 2D drawing."
- State: "Let's do a scavenger hunt! Get out your notebooks, and you must locate around the room 3 items that are flat -or 2 Dimensional, and 3 items that are 3 Dimensional, or objects."
- Students will draw or write the items from the scavenger hunt in their notebooks.
Activity 1: Matching 2D Shapes to 3D objects
Timing: 15 minutes
Materials
- Computer
- Projector
- Slides 4-6
- Matching game images
- Construction paper
- Glue
Attention Getter
- State: "Check out this video!"
- Play video from slide 4
Process
- State: "When we create an object, for example using Computer Aided Design, or CAD, we first create a 2D drawing of that object. 2D drawings are flat, while 3D objects project out into space -they have depth."
- Break students into groups of 3-4. Distribute a piece of construction paper, glue stick and bag containing the shapes for the matching game to each group.
- Instruct students to match and glue the 2D drawing of the shape to its 3D counterpart.
Activity 2: From 2D to 3D
Timing: 25 Minutes
*Note: this activity will reinforce the concept of creating 3D objects from 2D drawings. Students will craft 3D forms using Model Magic.
Materials
- Model Magic
- Paper handout of 2D to 3D
- Student notebooks
- Writing materials (pencils, pencil crayons, crayons, markers etc.)
- Slides 7-9
Attention Getter
- Show slide 7
- State: "It's time to try out your sculpting skills!"
Process:
- Show slides 8-9 to demonstrate to students 2D drawings and their 3D counterpart objects
- Break students into groups of 3
- Give each group a 2D drawing: A) Rectangle, B) Triangle, C) Pentagon, D) Circle
- Pass out Model Magic and assigned shape paper. 1 pack of Model Magic can serve 2-3 students.
- Each student will use materials to create a 3D object from their assigned 2D drawing, referring to the paper handout. I.e. use Model Magic to build a sphere by creating a circle then rolling it into a sphere.
- Students will compare their models with their group.
- Optional: If students are done early, they will use the modeling clay to create each shape option A-D.
Challenge
- If students finish in time, they will create a simple drawing in their notebook (such as a flower, tree, dog, house etc.)
- Students will use their 2D drawing to create a 3D object using Model Magic
- Students will share their designs with the student next to them
- Choose 2-3 students to share their drawings and counterpart objects with the class.
- Instruct students to wrap up their Model Magic for re-use next class.
Recap and Wrap Up:
Timing: 10 minutes
Process
- Ask students to reflect on the lesson.
- Recap: 2D refers to a flat drawing, and 3D refers to an object with depth/thickness that projects into space
- Instruct students to complete sentence stems.
Image 1

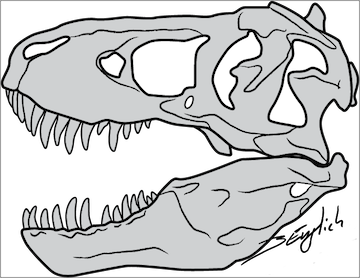
Image 2


Image 3

